Introduction to Electrical Engineering: Building Intelligent Hardware
Yasser Khan. First edition, 2026.
ISBN-13: 979-8-9826941-1-9
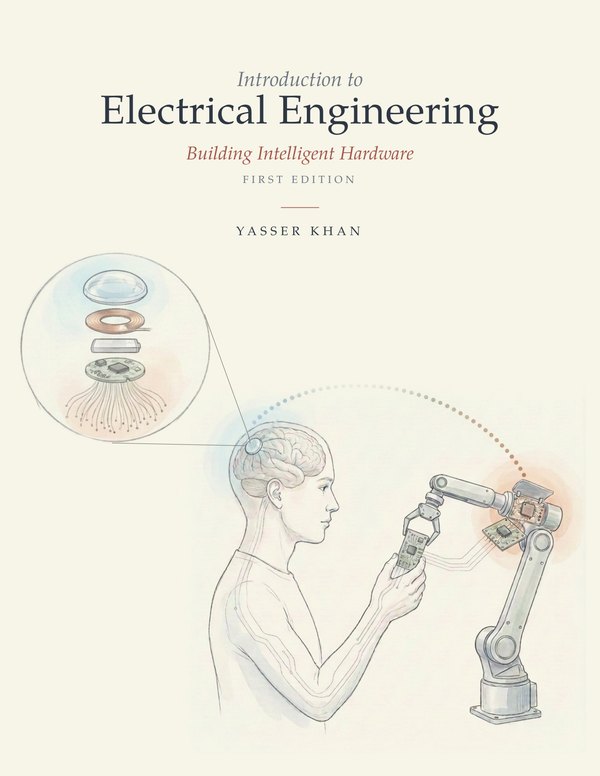
A watch measures a pulse with light, a car watches the lane with a camera, and an implant the size of a coin listens to neurons and turns their activity into the motion of a cursor. These devices sense the physical world, decide something about it on the spot, and communicate the result. Written for EE 105 at USC, this book takes a first-year student from a brain-computer interface taken apart into its blocks, through circuits, semiconductor devices, sensors, machine learning on a microcontroller, and optical communication, to a final project of the student's own design.
- Ten laboratory sections, each a complete lab manual, built around the EE 105 demonstration board and the Arduino Nano 33 BLE Sense
- Worked examples, chapter summaries, and more than 200 problems with answers
- A Python lab kit with a simulated board for practice away from the bench, and an illustrated guide to setting it up
- A section in every chapter on using AI tools responsibly: what to learn first and how to check what they say
- Color illustrations throughout
Download the PDF (intro-to-ee-textbook-v1)
Download the lab kit (ee105-labs.zip, 15 MB)
Lab kit guide: Start Here (PDF)
Lecture slides, lab guides, and a 15-week schedule, further down this page
The course at USC: ee105.org
Cite this book
Khan, Y. (2026). Introduction to Electrical Engineering: Building Intelligent Hardware. First edition. ISBN 979-8-9826941-1-9. University of Southern California. https://khan.usc.edu/introduction-to-electrical-engineering/
A course built around the book
The book grew out of EE 105, the first electrical engineering course at USC, and everything used to teach it is collected on this page: the textbook, the lecture slides, the lab kit with its guides, and a week-by-week plan. Students can work through it on their own or alongside a class. Instructors can adopt the whole course or take single modules into a course of their own.
For students
- Follow the schedule below, one module at a time: read the chapter, go through the slides of each lecture, and do the labs.
- Set up the lab kit once with Start Here. Each lab then runs from one Jupyter notebook, with the lab's section of the book open beside it.
- No demo board? Set
SIMULATE = Truein a notebook and it runs on the kit's simulated board. Labs 0.2 and 4.1 use no board at all. - Check your work on the chapter problems with the answers in Appendix A of the book.
For instructors
- The course has six modules and a final project, with one chapter of the book for each. A module is a chapter, its lecture slides, one or two labs, the chapter's problems, and a short quiz in class.
- The schedule below fits a 15-week semester with two sessions of 110 minutes a week, lectures and labs in the same room. To teach a single topic, take its module: Module 3, for example, is Chapter 3, Lectures 13 to 16, and Labs 3.1 and 3.2.
- The hardware labs need a demo board and a laptop for each student. Without boards, the same notebooks run on the kit's simulated board.
- Every lab notebook ends by writing one results file, which can be graded automatically. A solutions manual, solution notebooks with notes on every lab, and the grader are available to instructors: write to yasser.khan@usc.edu.
An approximate schedule
EE 105 at USC runs for 15 weeks with two sessions a week. The map shows which module fills which weeks, and the same colors mark every session in the table under it. Shift the pieces to fit your own calendar. Lecture numbers have gaps where a lab session took the slot. Every link opens a PDF of the slides.
| Week | Module and chapter | First session | Second session | Quizzes, project, exams |
|---|---|---|---|---|
| 1 | 0 Introduction | Lecture 1: introduction to electrical engineering. Boards handed out. | Lecture 2: system design and an introduction to Arduino. Demo of the board. | |
| 2 | 0 Introduction | Lab 0.1 Arduino and the demo board (guide, setup slides) | Lab 0.2 Python bootcamp (guide) | |
| 3 | 1 Circuits | Lecture 5: circuit analysis 1 | Time to finish Labs 0.1 and 0.2 | |
| 4 | 1 Circuits | Lecture 6: circuit analysis 2. Lab 1.1 Asymmetric touch panel (guide) |
Lecture 7: circuit analysis 3. Lab 1.2 Circuit analysis with Python, first half (guide) |
Quiz 1 on Module 0 |
| 5 | 1 Circuits 2 Devices |
Lecture 8: circuit problems, a recap. Lab 1.2 second half |
Lecture 9: devices 1 | |
| 6 | 2 Devices | Lecture 10: devices 2 | Lab 2.1 Diode and transistor I-V characteristics (guide) | Quiz 2 on Module 1 |
| 7 | 2 Devices | Lecture 12: optoelectronics. Practice midterm. | Midterm circuits and devices | Quiz 3 on Module 2 |
| 8 | 3 Sensors | Lecture 13: sensors 1. Lab 3.1 Thermistor temperature sensor (guide) |
Lecture 14: sensors 2 | Final project teams form |
| 9 | 3 Sensors | Lab 3.2 Pulse oximeter and PPG (guide) | Lecture 16: sensors 3 | Project plan due |
| 10 | 4 Machine learning | Lecture 17-18: machine learning on hardware, first half | Lab 4.1 Neural networks, first half (guide, training slides) | |
| 11 | 4 Machine learning | Lecture 17-18, second half | Lab 4.1 second half | Quiz 4 on Module 3 |
| 12 | 4 Machine learning 5 Communications |
Lecture 19-20: neural networks. Lab 4.2 Camera classifier (guide, lab slides) |
Lecture 21: optical communications | |
| 13 | 5 Communications | Lab 5.1 LiFi, sending text over light (guide) | Lecture 22: symbol generation and sensor fusion, with a demo | |
| 14 | 6 Final project | Lab tours, or project work | Project work | Quiz 5 on Module 4. Practice final. |
| 15 | 6 Final project | Project presentations and demos | Project presentations and demos | Quiz 6 on Module 5 |
| Finals | Final exam covers the whole course | |||
Quizzes: six, taken in class with pen and paper, one for each of Modules 0 to 5: Arduino and Python, circuits, devices, sensors, neural networks, and optical communications. The problems at the end of Chapters 0 to 5 are the practice for them; their answers are in Appendix A of the book, and worked solutions are in the solutions manual. At USC the grade is 30% final exam, 30% midterm, 20% quizzes, 10% labs, and 10% final project.
Lecture slides
Sixteen decks, as taught in 2026. Each goes with the chapter of its module.
- Module 0 Chapter 0: Electrical Engineering and Electronic Systems
Lecture 1: what electrical engineering is, a brain-computer interface taken apart, transistors and scaling, the course
Lecture 2: breaking a system into blocks, voltage, current, resistance, Ohm's law, prototyping, Arduino - Module 1 Chapter 1: Circuits
Lecture 5: circuit elements, KCL and KVL, series and parallel, dividers, finding nodes
Lecture 6: meters, nodal analysis, the resistor grid of the demo board
Lecture 7: Thevenin and Norton equivalents, capacitors, inductors
Lecture 8: Thevenin and Norton examples and three worked problems - Module 2 Chapter 2: Semiconductor Devices
Lecture 9: semiconductors, doping, band diagrams, the diode
Lecture 10: the diode equation, the MOSFET, CMOS
Lecture 12: the MOSFET square law, LEDs, photodiodes
- Module 3 Chapter 3: Sensors
Lecture 13: the thermistor and its divider, sensor types, calibration, bridges, noise
Lecture 14: pulse oximetry, the Beer-Lambert law, the PPG signal, heart rate
Lecture 16: op amps, the photodiode read circuit, filters, the frequency domain - Module 4 Chapter 4: Machine Learning
Lecture 17-18: machine learning on a microcontroller, features, training and test sets, the confusion matrix, model fit
Lecture 19-20: perceptrons, sigmoid neurons, network layers, gradient descent - Module 5 Chapter 5: Communications
Lecture 21: optical fiber, modulation, the transimpedance amplifier, noise and bandwidth, a light link end to end
Lecture 22: sensor fusion, Kalman filtering, and an Arduino demo with light and sound - Module 6 Chapter 6: The Final Project
No slides: the chapter is the guide, from the idea and the plan to the demo and the report.
The ten labs
Each lab is a section of the book, which is its lab manual, and a notebook in the lab kit. The guide of each lab is a short slide deck for the start of the session.
| Lab | In the book | What students do | Needs | Slides |
|---|---|---|---|---|
| 0.1 | Section 0.11 | Arduino and the demo board. Program the Arduino from a notebook: blink it, read its sensor, measure a circuit, dim an LED. | Demo board | guide, setup slides |
| 0.2 | Section 0.12 | Python bootcamp. Drill the Python and NumPy you will use every week: six questions, a linear system, real data. | Laptop only | guide |
| 1.1 | Section 1.10 | Asymmetric touch panel. Turn one voltage into a button name: measure nine buttons, check them with KCL, build a decoder. | Demo board | guide |
| 1.2 | Section 1.11 | Circuit analysis with Python. Write KCL and Ohm's law for the touch-panel grid, solve it two ways, and check it on the board. | Demo board, a 4.7 kΩ and a 10 kΩ resistor, a multimeter | guide |
| 2.1 | Section 2.12 | Diode and transistor I-V characteristics. Sweep a diode and a MOSFET from Python and pull their key numbers out of the curves. | Demo board | guide |
| 3.1 | Section 3.10 | Thermistor temperature sensor. Turn the board into a thermometer and measure how good it is. | Demo board, a 10 kΩ NTC thermistor (beta 3950), a 10 kΩ resistor | guide |
| 3.2 | Section 3.11 | Pulse oximeter and PPG. Shine red and infrared light into your fingertip and read your heart rate and blood oxygen. | Demo board | guide |
| 4.1 | Section 4.10 | Neural networks. Build, train and test neural networks in PyTorch, then test one on your own handwriting. | Laptop only; paper, a dark marker, a phone camera | guide, training slides |
| 4.2 | Section 4.11 | Camera classifier. Show the board's camera a digit you wrote, and let your Lab 4.1 network read it. | Demo board, the OV7675 camera module | guide, lab slides |
| 5.1 | Section 5.10 | LiFi, sending text over light. Send a text file from one board to another with light, then push the link until it breaks. | Two demo boards | guide |
The demo board is one printed circuit board that carries the Arduino Nano 33 BLE Sense and the circuits of every lab: a resistive touch panel and a resistor grid, a diode and a MOSFET, an optical pulse sensor, two LED and photodiode pairs, and a header for the camera. Section 0.8 of the book describes it. Every lab also needs a USB data cable from the Arduino to the laptop. The lab kit installs with one setup file on Windows and on macOS.